Last year was my first Christmas in blogland & I joined in with Debby's Favourite Five Christmas Cards of 2010 post. This year she has again made a selection of her Favourite Five Christmas Cards & although it has been a bit of a lean year for me in terms of making cards - especially Christmas cards (checking back I only had to choose from a total of 7) I didn't want to miss joining in with the fun.
Wednesday, 28 December 2011
Saturday, 24 December 2011
Starlight
......... for we haue seene his Starre in the east, and are come to worship him.
The Gospel According to S. Matthew 2:2
The Holy Bible Authorized Version 1611
As I was making this card I kept thinking of the Star of Bethlehem & the Christmas story of Christ's birth.
The last of my Christmas cards - safely delivered this morning. I used the same sparkly Winter Wonderland Embossing Powder that I did here but this time I lost count of how many photos I took in attempting to show its sparkle. The turkey is defrosting but I have presents to wrap & a major catching up of blogland.
Recipe
Stamps Chocolate Baroque UA4SP0170 Christmas Fusion.
Cardstock An assortment of blues in various finishes, white & holographic silver mirri from stash.
Inks VersMark watermark stamp pad with Stampendous Winter Wonderland Embossing Powder, Brilliance Starlite Silver (inking some cardstock & paper edges).
Papers Making Cards September 2008.
Punches Woodware (circle & scalloped circle), Xcut (star).
The ribbon & gems are from stash.
The Gospel According to S. Matthew 2:2
The Holy Bible Authorized Version 1611
As I was making this card I kept thinking of the Star of Bethlehem & the Christmas story of Christ's birth.
The last of my Christmas cards - safely delivered this morning. I used the same sparkly Winter Wonderland Embossing Powder that I did here but this time I lost count of how many photos I took in attempting to show its sparkle. The turkey is defrosting but I have presents to wrap & a major catching up of blogland.
With Greetings of the Season
&
Best Wishes for 2012
Clicking on the images should enable enlarging
![]() |
| front of card |
![]() |
| close-up of focal image |
![]() |
| angled close-up to show sparkle of heat embossing & convex dimensional mounting |
![]() |
| inside of card |
![]() |
| close-up showing holographic silver mirri cardstock & paper piercing of message panel |
Stamps Chocolate Baroque UA4SP0170 Christmas Fusion.
Cardstock An assortment of blues in various finishes, white & holographic silver mirri from stash.
Inks VersMark watermark stamp pad with Stampendous Winter Wonderland Embossing Powder, Brilliance Starlite Silver (inking some cardstock & paper edges).
Papers Making Cards September 2008.
Punches Woodware (circle & scalloped circle), Xcut (star).
The ribbon & gems are from stash.
Friday, 23 December 2011
Ornamental Sparkle
I shall post the results of my poll about "Following" & the conclusions I have come to once Christmas is over. In the meantime I had two cards left to make & have just managed to get these done ready for delivery by hand on Christmas Eve.
Although it took a while to work out how to "hang" the ornaments I was very pleased with the result. Another aspect that quite delighted me was the way the "Merry Christmas and a Happy New Year" wording worked out on the patterned paper for the inside of the card.
![]() |
| front of card |
![]() |
| angled view to show sparkle of glittered ornaments & mirri card used for layering |
![]() |
| close-up showing heat embossing & glittering of ornament |
![]() |
| close-up showing dimension & gold thread "hanging" of ornaments |
![]() |
| inside of card |
![]() |
| close-up showing paper piercing of sentiment panel |
Recipe
Stamps Chocolate Baroque UDLSP0304 Christmas Decorations.
Inks VersaMark watermark stamp pad with Stampendous Gold Tinsel Embossing Powder, Peeled Paint Distress Ink (inking some cardstock & paper edges). Brilliance Galaxy Gold (edging stamped images).
Colouring Ice Stickles Glitter Glue (Crystal Ice).
Cardstock Craft UK Limited (card blank); an assortment of white, gold & green cardstock from stash.
Papers Making Cards The Craft Creations Collection Christmas Papers.
Punches Woodware (oval & scalloped oval).
The ribbon, gold star sequins & gold thread are all from stash.
Tuesday, 20 December 2011
Snowflake Blue
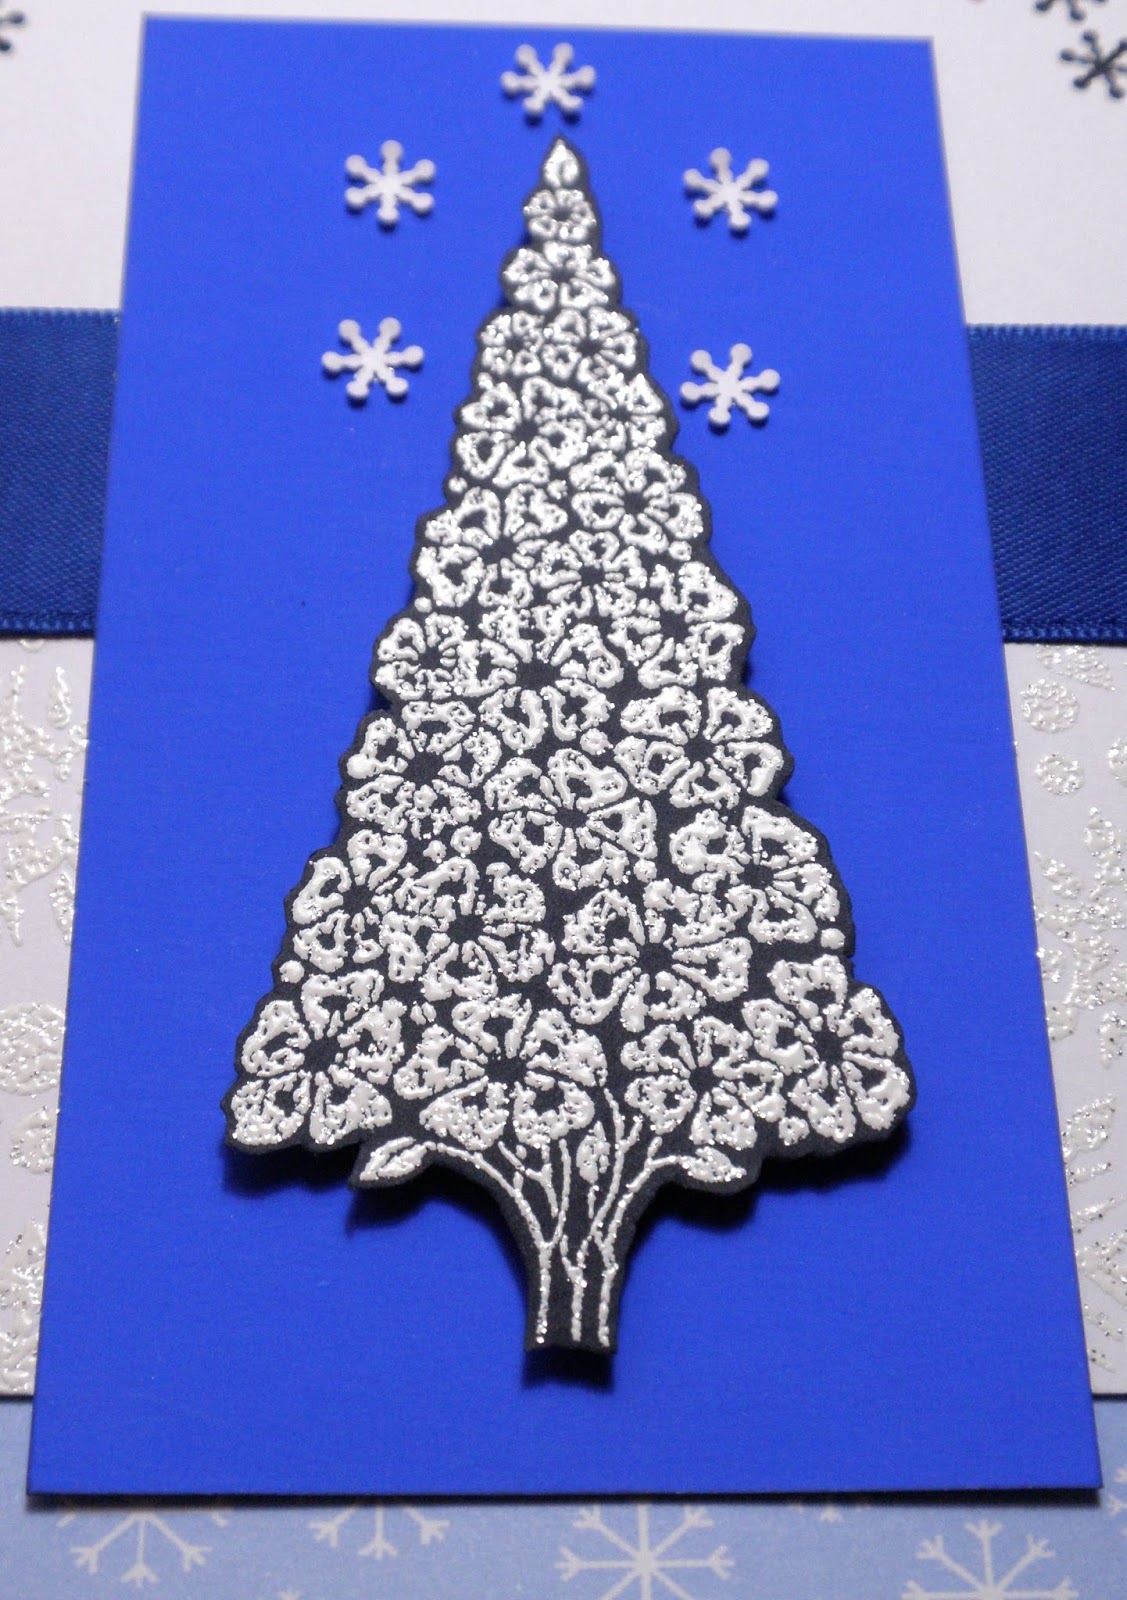
Christmas Trees & Snowflakes are images that I associate with winter - probably something to do with my first 6 Christmases which were spent in Sweden; those that I remember involved skiing through the pine forests on my own small skiis. I don't remember skiing after we moved to the UK in 1967 although both my brother & Father liked nothing more than to set off for Austria to ski during the Easter Holidays.
Edited 22 Dec
I have uploaded all the photos again as the first set were not clickable for enlarging.
![]() |
| close-up showing detail & sparkle of heat embossed tree |
![]() |
| close-up showing detail of tree & dimension achieved by using 2mm foam pads for mounting |
![]() |
| inside of card |
![]() |
| close-up to show paper piercing of message panel |
Recipe
Stamps Chocolate Baroque UDLSP0304 Christmas Decorations (tree) & UA6SP0267 Winter Wonderland (snowflake patterns).
Inks VersaMark watermark stamp pad with Stampendous Winter Wonderland Embossing Powder, Chipped Sapphire Distress Ink (distressing some cardstock & paper edges).
Cardstock an assortment of blues & whites plus patterned in various finishes from stash.
Punches, Dies EK Success (Iron Eagle corner), Xcut (snowflake corner - the small snowflakes are the waste from the corner), Woodware (circle); Spellbinders Shapeabitlities Sprightly Sprockets;
The ribbon & snowflake sequins are from stash.
Challenges Entered
Everybody Art Challenge 173 - Anything GoesJoanna Sheen Challenge 1 - Christmas Wishes
Sunday, 18 December 2011
A Question of Blog Following
I am in the process of deciding which blogging platform to use & one of my main criteria is how easy it would be for people who wish to to follow my blog. I would very much value some feedback & to that end have placed a poll to the right in my sidebar.
I have been working on becoming familiar with two blogging platforms & need to choose which one to pursue as I want to be able to concentrate on colouring & getting my fingers inky.
Thank you for any help or comments you might wish to leave.
Edited 12 December
Having initially set the poll for a couple of days only from yesterday I realised the time span was too short so have reset it for a week leaving this post (I hope!!) as a "sticky" 11-18 December.
This is proving very interesting indeed & moreover extremely helpful - THANK YOU.
I have been working on becoming familiar with two blogging platforms & need to choose which one to pursue as I want to be able to concentrate on colouring & getting my fingers inky.
Thank you for any help or comments you might wish to leave.
Edited 12 December
Having initially set the poll for a couple of days only from yesterday I realised the time span was too short so have reset it for a week leaving this post (I hope!!) as a "sticky" 11-18 December.
This is proving very interesting indeed & moreover extremely helpful - THANK YOU.
Friday, 16 December 2011
Tying A Patterned Ribbon Bow Right Side Up
The main inspiration for what follows is a video tutorial by Becca Feeken of Amazing Paper Grace where she explains how to tie peg bows. I like to have my ribbon tails both exiting the bow from behind & showing the right side (as Becca does), moreover with a patterned ribbon having an up or down motif (as in my example where the flower stems grow up out of the ground) I don't want any part of the bow looking as if it is upside down. Not always having pegs to hand I thought I would see if it was possible to do something similar using my fingers & the following is what resulted.
1) Using a piece of ribbon about 12 inches long
2) & placing the bottom edge of patterning to the left, loop the ribbon around the first two fingers as shown.
3) Taking the left tail place it over the right ribbon & flip over between the first two fingers.
4) Turn the hand over & ensure the right side of the ribbon you have just flipped over is facing you & the bottom edge of the pattern is to the left.
5) Insert the tail down through the gap between the two fingers as shown.
6) Turn the hand back so the palm faces you & the ribbon just inserted through the gap has the wrong side facing you.
7) Pull the top tail straight down so the wrong side faces you & the tail is towards the right of the first tail as shown.
8) Taking the left tail fold it up & over the second tail as shown.
9) Insert the tail through the loop formed by the second tail as shown.
10) Pull the first tail upwards & the second tail downwards ensuring both the tails have their wrong sides facing you.
11) Pull tight
12) Turn the hand over & neaten the centre fold if necessary.
13) Turning the hand back so that the palm faces you the knot should look like this with an inverted U or horseshoe shape visible.
14) The tails can be pulled downwards......
15) ....... or sideways
16) ......& the ends snipped as desired.
Here you can see that both bows have the flowers growing upwards out of the ground whether looking at the bows themselves or the tails.
1) Using a piece of ribbon about 12 inches long
2) & placing the bottom edge of patterning to the left, loop the ribbon around the first two fingers as shown.
3) Taking the left tail place it over the right ribbon & flip over between the first two fingers.
4) Turn the hand over & ensure the right side of the ribbon you have just flipped over is facing you & the bottom edge of the pattern is to the left.
5) Insert the tail down through the gap between the two fingers as shown.
6) Turn the hand back so the palm faces you & the ribbon just inserted through the gap has the wrong side facing you.
7) Pull the top tail straight down so the wrong side faces you & the tail is towards the right of the first tail as shown.
8) Taking the left tail fold it up & over the second tail as shown.
9) Insert the tail through the loop formed by the second tail as shown.
10) Pull the first tail upwards & the second tail downwards ensuring both the tails have their wrong sides facing you.
11) Pull tight
12) Turn the hand over & neaten the centre fold if necessary.
13) Turning the hand back so that the palm faces you the knot should look like this with an inverted U or horseshoe shape visible.
14) The tails can be pulled downwards......
15) ....... or sideways
16) ......& the ends snipped as desired.
Here you can see that both bows have the flowers growing upwards out of the ground whether looking at the bows themselves or the tails.
Wednesday, 14 December 2011
Christmas White
Glenda Waterworth has set a White Christmas Challenge with the prize being a Chocolate Baroque Gift Voucher to the value of £1 for every entry made (maximum £50).
One of the this year's Chocolate Baroque Christmas stamp sets is Steampunk Christmas & having recently purchased the Spellbinders Shapeabilities Sprighly Sprockets I wanted to combine the two in some kind of wreath design. This card is what evolved as I worked.
The flower centre started off as one link from a string of white plastic flowers which I coloured red with a Copic Ciao Marker; that didn't look right; neither did a covering of Xmas Red Stickles mixed with Glossy Accents but, by the time I'd added red micro beads to the mix & let it dry overnight I was rather pleased with the resulting glittery textured effect. I only had pink pearls no red - but that was easily rectified with the Red Copic Ciao.
![]() |
| front of card |
![]() |
| close-up to show dimension of flower & embellishments |
![]() |
| close-up to show micro beads & glittering of flower centre |
![]() |
| close-up showing ribbon embellishing & sparkle of holly leaves |
![]() |
| inside of card |
![]() |
| close-up to show paper piercing of sentiment & message panels |
![]() |
| close-up showing heat embossed sentiment, paper piercing & textured cardstock |
Recipe
Stamps Chocolate Baroque UA4SP0362 Steampunk Christmas (image) & UA6GW0211 Celebration Alphabet (sentiment).
Inks Fired Brick Distress Ink (image), VersaMark watermark stamp pad with Stampendous Detail White Embossing Powder (sentiment).
Colouring Copic Ciao Markers, Ice Stickles Glitter Glue (Crystal Ice), Stickles Glitter Glue (Xmas Red).
Cardstock Craft UK Limited (card blank), Bits N Pieces A4 Assorted Embossed Card (Snow White), red pearlescent & white from stash.
Punches/Dies Woodware (scalloped circle & scalloped oval, small & large holly sprigs), Xcut (holly leaf); Spellbinders Shapeabilities Sprightly Sprockets.
The red micro beads are Woodware & the remaining embellishments (sequin flower & bead, ribbon, gems & pearls) are from stash.
Challenges Entered
Glenda Waterworth/Chocolate Baroque White Christmas Challenge
Stamps Chocolate Baroque UA4SP0362 Steampunk Christmas (image) & UA6GW0211 Celebration Alphabet (sentiment).
Inks Fired Brick Distress Ink (image), VersaMark watermark stamp pad with Stampendous Detail White Embossing Powder (sentiment).
Colouring Copic Ciao Markers, Ice Stickles Glitter Glue (Crystal Ice), Stickles Glitter Glue (Xmas Red).
Cardstock Craft UK Limited (card blank), Bits N Pieces A4 Assorted Embossed Card (Snow White), red pearlescent & white from stash.
Punches/Dies Woodware (scalloped circle & scalloped oval, small & large holly sprigs), Xcut (holly leaf); Spellbinders Shapeabilities Sprightly Sprockets.
The red micro beads are Woodware & the remaining embellishments (sequin flower & bead, ribbon, gems & pearls) are from stash.
Challenges Entered
Glenda Waterworth/Chocolate Baroque White Christmas Challenge
Joanna Sheen Challenge 1 - Christmas Wishes
Make My Monday Week 28 - Seasonal Theme + Red Ribbon
Stampalot Challenge December - Bingo (my line on the Bingo Grid can be either the vertical pearls-mist/stickles-ribbon or the diagonal pearls-flowers-punch)
TimbroScrapMania Stamping Challenge 38 - Bow
Make My Monday Week 28 - Seasonal Theme + Red Ribbon
Stampalot Challenge December - Bingo (my line on the Bingo Grid can be either the vertical pearls-mist/stickles-ribbon or the diagonal pearls-flowers-punch)
TimbroScrapMania Stamping Challenge 38 - Bow
Subscribe to:
Posts (Atom)